Friday 6 November 2015

GH Whatsapp v2.0 by sparrow


Hi There!
GH whatsapp version 2.0 is out with much improvement, stability and anti-ban as well. This update
consist of both twitter emoji and stock emoji..
For more details check screenshots below. Much thanks to Nii, Myke, Iyke and you the user.


        What’s New?

  1. All previous change log still holds
  2. latest play store Base (2.12.317)
  3. Package name (com.whatsapp)
  4. App loads much faster
  5. All previous changelog still holds
  6. Launcher icon changed
  7. Smaller size. (19mb)
  8. Stable mod
  9. In-app icons changed.


      How To Install

  1. Uninstall any previous version of whatsapp on your device
  2. Install official whatsapp and verify your number.
  3. Backup your chat 2 times
  4. Uninstall official whatsapp and install GH whatsapp
  5. Follow the simple steps required for whatsapp
  6. Done!
  7. Start using it. Enjoy !
               Screen Shots


             ( twitter emoji)                                  


              (stock emoji)


            Download Links

              ZippyShare
    stock emoji       twitter emoji

               Dropbox
    stock emoji      twitter emoji

                Mediafire
    stock emoji      twitter emoji

               Telegram
    stock emoji      twitter emoji


Saturday 3 October 2015

GH whatsapp v1.90 by sparrow

GH whatsapp v1.90 by sparrow is out.
It comes with much changes and improvements and it's a must use app for all.
Much thanks to every lover and user of this app. Not forgetting those that helped me in spreading my previous mod.


Change log

*Base updated 2.12.294

*Package name (com.whatsapp)

*App loads much faster

*All previous changelog still holds

*Launcher icon changed

*Smaller size. (20mb)

*Stable mod

*Few in-app icons changed.

        Screen Shots


Download links

here (google drive)
or 
here (mediafire)
or
here (zippyshare)
or 
here (dropbox)
or
here (telegram)

Friday 11 September 2015

GH WhatsApp (version 1.8) by Sparrow

The third official update of GH WhatsApp is here with much changes and improvements


Credits.

Samyadeep
Nii Abbey
Krisu
Iyke Qwame
Pharrel


Change Log.


-Base updated to 2.12.272.
-All emoticon are tinted .
-Message unsent icon change .
-Communities have being reverted back to groups due to some few challenges.
-Group avatar changed .
-Self avatar changed .
-Attach pop up background colour changed for easy visibility.
-Back arrow also changed .
-Many icons changed .
-Download and experience the new interface of Gh WhatsApp.

How To Install GH WhatsApp

If you are already on official whatsapp just use any of the
download links provided, download the app and install.

but if you are using other forms of whatsapp or you want to make
a fresh installation please follow this steps.

1. Download & install official whatsapp from playstore

2. Enter your number and wait for it to be verified .

3. Restore your chat backup (that is if you have any)

4. Now wait for the app to initialize.

5. After installation you are free to install GH WhatsApp.

Comments, requests , and suggestions are welcomed

*** don't forget to share ****


Download Links

Here (Google drive )
Or
Here (Dropbox)
Or
Here ( mediafire)
Or
Here (Telegram)

 Screen Shots 

Saturday 29 August 2015

GH WhatsApp (version 1.5) by sparrow

Hi there!

Today I'm much delighted to bring you the second update of GH WhatsApp. Much thanks to Isaac Benchi for giving the logo a new look not forgetting Samyadeep for designing the ticks .

Change log

* Attach pop-up background changed from white to brown.

*Default ticks have been changed to letters
-S : Send
-D : Delivered
-R: Read

* Default background changed to Ghana flag.

*New settings added, this is to help you get the latest update with just a click .

* Groups remained to Communities .

* "Type a message" has being changed to "What's on your mind "

*Default widget preview changed to GH WhatsApp.

More features added. Download and experience it.

             Screen Shots


Download links


zippy share

Comments , requests and suggestions are welcomed.

Thanks #sparrow

Saturday 22 August 2015

GH WhatsApp (Version 1.0) by Sparrow

Hello Guys . Today I present to you the first ever WhatsApp made in Ghana. It has a beautiful interface and a must use for everyone . Special thanks to.
*Tips & Tricks
*Programmes Pub &
*Tech Room
.............................................
Change log (version 1.0)
..............................................
*Base updated
*Default Wallpaper Changed.
*Default WhatsApp icon changed
*Added option to mute groups & chats till Dumsor ends
*Default Color changed from Green to Brown.
*Some text has also being changed
Eg. "Online" has been changed to "Active Now".
       "Last seen" has been changed to "Away since"
         Etc. Download to discover more .
*Name changed to GH WhatsApp.
* New set of emoji added.

How To Install GH WhatsApp

If you are already on official whatsapp just use any of the
download links provided, download the app and install.

but if you are using other forms of whatsapp or you want to make
a fresh installation please follow this steps.

1. Download & install official whatsapp from playstore
2. Enter your number and wait for it to be verified .
3. Restore your chat backup (that is if you have any)
4. Now wait for the app to initialize.
5. After installation you are free to install GH WhatsApp.

feel free to comment below if you encounter any problems.

Check screen shots for more details


 ..............................
Download links .
..............................

Here ( Google drive link )
Or
Here ( Dropbox)

Note:

Don't forget to share 
.
Thanks #Sparrow


Sunday 9 August 2015

How to run games without graphic card


In this tutorial i will teach you guys how to run games without graphic card. Using this tutorial you will able to run high end games on low-end computer easily without having good graphics card. 

Lets start here:-

How To Run Games Without Graphics Card 2015

METHOD 1- USING 3D-ANALYZE
3D Analyze is a powerful application that allows to play many DirectX based games using video hardware officially unsupported and unable to run these. With it you can optimize its efficiency, above all if your CPU will permit, although still with a low range card. This program supports Direct3D as much as OpenGL, whichever it may be to optimize your system. Now I'll show you how to install and configure 3D-Analyze main settings to play games.

Steps:-

*First of all download the 3D Analyze
*Now install and run the 3D analyze.
*Now click on select option below, a new window will open where you have to select the exe file of the game which you wants to run.
*Now you will see these names, vendorID and deviceID of different graphics cards. Select any one item and enter the VendorID and DeviceID in the column at the left side.
* Now  click on Run button and Enjoy.

 METHOD 2- USING SWIFT SHADER

SwiftShader's modular architecture is capable of supporting multiple application programming interfaces, such as DirectX® 9.0, and OpenGL® ES 2.0, the same APIs that developers are already using for existing game and applications. SwiftShader can therefore be directly integrated into applications without any changes to source code.It is also similar to 3D analyze.

Steps

First of all download the SwiftShader.
*Download Swiftshader 3.0 for x64bits.    
*Download Swiftshader 3.0 for x32bits 
Now extract the zip file of SwiftShader.
Now copy d3d9.dll file from the extracted folder.
Paste the d3d9.dll file to the game's directory.

Just click on exe file of your game where you placed the d3d9.dll file and Enjoy!!

Thanks #sparrow

How to Use Pendrive As A Computer Password-Like A hacker


Credits : Elf

In this tutorial I'm going to lecture you on how to use your pendrive as your windows pc login password. Most hackers make use of this method to secure their files because of how they value their privacy. Now its your turn to learn it and also make use of it . Below are the steps you need to follow 

 Steps

1. Insert your pen drive into the PC.

2. Open Run window by pressing 'win key R'.

3. Type 'compmgmt.msc ' and click OK button.

4. Computer Management Dialog box appears on the screen.

5. Choose 'Disk Management' in left panel of  computer management.

6. Right click on your pen drive and select 'Change Drive Letter and Paths'.

7. Click the change button and Change Drive Letter or Path in the dialog box that appears.

8. Choose 'A' and click OK button.
Now your pen drive will act like a Floppy Disk.

9. Open Run window once again by pressing 'win key R'.

10. Type 'syskey' and click OK button.

11. Securing the Windows Account Database dialog box will pop up on the screen.

12. Click the Update button. Now Start up Key dialog box will  pop up.

13. Select 'Store Start-up Key on Floppy Disk' and click OK button.

Now onwards you will be asked to Login by inserting your pen drive and typing  your password after inserting


Note
This action is irreversible,  use at your own risk.


Thanks #sparrow

Saturday 8 August 2015

Play store errors and solutions


Here is a list of play store errors with their problems and solutions:-

1.Google Play Error 491
Can’t download or error while updating an application.
Solution:-
Remove the current Google account you are trying to download with.then reboot and add it again. If problem does not solves clear data of Google
services and play store.

2.Google Play Error 498
Download can’t be completed or interrupted.
Solution:-
Uninstall some apps and clear the cache.

3.Google Play Error 413
Can’t download any application or update it.
Solution:-
Clear the data of Google services and play store.Also force stop them and then again try to download the application.If you had set
Proxies,just remove them and clear your browser’s cache.

4.Google Play Error 403
Downloading fails and the request is forbidden due to two google accounts running in the same device.
Solution:-
Clear Proxy,Remove and again add APN (Access Point Networks),Clear the search History.If problems persists remove the current google
account then add new google account and try to download the application from play store again.

5.Google Play Error 492
The required application can be downloaded but fails to install.
Solution:-
Firstly go to setting and then Apps and force stop the google services and Google Play Store and then clear data.If Problems doesn’t solves
Clear the Dalvik cache by going to Phone’s Custom Recovery Mode.

6.Google Play Error 919
The required application gets downloaded but it can’t be opened.
Solution:-
Clear some space on your device by uninstalling unncessary applications,images,audio,video, or large files etc.

7.Google Play Error 927
The Download can’t be completed due to upgrade of play store.
Solution:-
Wait till the Google Play Store gets
updated.Then try again to download the application.

Thanks  

Friday 7 August 2015

How to fix a Windows PC that doesn’t detect external USB devices


USB detection issues on a Windows PC could result in different error messages and sometimes the Blue Screen of Death . These errors could range from the often less serious “USB not recognized” under System tray and “Unknown USB device” under Device Manager to the more serious USB device appearing grayed and unusable under My Computer. We’ll be taking a look at possible causes of USB device detection problems on a Windows PC and fixes that work.

What could cause a Windows PC not to detect a USB device?

Common causes of USB detection issues are:

1.Damaged or incompatible USB cord: The USB cord might not be powerful enough or be broken somewhere along its length

2.Faulty USB port: The PC or USB device’s port might be faulty, loose or coated with debris

3.Missing or incompatible drivers: The PC needs the correct drivers installed in order to properly detect and communicate with an external USB device

4.Windows OS problems: The PC might have encountered an error (often corrupted system files or resource hogging)

5.Hardware or software corrupted USB device: The device might have encountered a hardware or software error which is preventing the PC from detecting / recognizing it

6.Too many USB devices connected at a time: Connecting too many USB devices at a time (especially to a slow or busy PC) could cause a delay in detection or no detection at all
How do I fix a Windows PC that doesn’t detect external USB devices?

Some fixes to consider are:

1.Try using a different USB cord

2.Restart the Windows PC to clear OS errors. Consider a system restore if you suspect that your PC’s OS is faulty

3.Manually install the correct drivers for the USB device if automatic installation keeps failing
If its a phone, connect it to the PC without a battery and also while switched off with a battery

4.Try using a different port on the PC

5.Consider cleaning or changing the USB port of the device if possible

6.Leave the USB device connected just in case its a power problem

7.Disconnect all other USB devices then reconnect the USB device

I hope with this your problem will be solved .
Thanks #sparrow

HOW TO RUN ANDROID LOLLIPOP ON PC WITHOUT VIRTUAL BOX


Android 5.0 “Lollipop” is the latest version of the Android mobile operating system developed by Google.
Unveiled on June 25, 2014 during Google I/O, it became available through official over-the-air (OTA) updates on November 12, 2014, for select devices that run distributions of Android serviced by Google (such as Nexus and Google Play edition devices).

How To Run?

First Download Android Lollipop v5.0 ISO & Unet Bootin App from the link provided below. 

Requirements 
You Need Flash Drive With 2 GB Minimum Size

Steps
1. Plug Your Flash Drive To The PC.
2. Open Unet Bootin App The One You Downloaded.
3. Choose “Disk Image” Option To Select The “Android 5.0″ ISO File The One You Downloaded.
4. Select Your Flash Drive To Copy The Boot Files From The Android 5.0 ISO File & Then Click On “OK” & Now Unet Bootin Should CreateYour Bootable Flash Drive With Android 5.0 System On It.
5. Restart Your PC & Boot From Your Flash Drive.
6. Chose First Option To Run Android 5.0 .
7. Next Screen may takes 1- 4 minute to load. so be patient and wait.
8. After that, Lollipop will start.
9. Enjoy!

Download links
Thanks #sparrow

Sunday 2 August 2015

How To Find Your Phone In Silent Mode


Ever kept your phone on 'silent' mode and kept it somewhere you can't remember?
If your answer is yes, Ring My Droid is the app to solve your problems!


Ring My Droid application has an SMS-triggered alarm system. When you install the app, you are asked to set a 'Key Phrase'. Then at any time after that you ever forget where you kept your phone, just use another phone or get on of your friends to SMS your Key Phrase to your phone.
Once the phone receives the Key Phrase as a SMS message, it starts to ring even if it is kept of silent mode! After that it is just a matter of following the sound and finding your phone back.


--Note--
By default the Key Phrase is set to RingMyDroid. Change it to whatever you want and click the 'Set' button. It is highly recommended that you set a new Key Phrase.
Your Key Phrase is like your password. Keep it with you, otherwise people or some prankster friends may SMS you your Key Phrase and set off your alarm anytime! ;)


Download Ring My Droid -  Here

Thanks #sparrow

How to remove memory card password easily


Credits: XposedGp


Method 1:

This is the first and easy method to recover your forgot password.
Firstly download ES file explorer from Playstore.
Open Es file explore and Go to System folder and locate for a file named mmcstore.
Then send mmcstore file to your PC or Laptop.
Now open mmcstore in notepad in your PC.
After opening the file, you will able to see your password there.
This is your real password which you forget.
Now apply that password to open your locked memory card.
That’s It.


Method 2:

First of all insert that locked the memory card to your phone.
Connect your phone to the PC via data cable.
Now right click on the Memory card and click on format.(It will not ask for password)
After formatting your memory card, your memory card will be unlocked.
Note –In Method two if you don't have any another choice and if your memory card data not important, then you can apply this method because in this method you will loose all your Data.

Thanks #sparrow

How to remove shortcut virus from pendrive or pc


Credits: XposedGP


METHOD 1:- USING USB FIX
If your flash drive is infected with shortcut virus than you can try USB Fix method, its one of the easiest method to remove shortcut virus.
Download USB Fix.
Connect Pen drive to be cleaned of shortcut virus.
Run USB Fix.
Select “Deletion” and wait for process to remove shortcut virus from your pen drive.
Important Note➡ All other processes will restart while software runs so keep other programs or files closed. Otherwise, there will be loss of data. To see log report Go to C:\USBfix.txt.

METHOD 2:- REMOVE SHORTCUT VIRUS USING CMD

If you don’t want to download any software to remove virus, then you can use CMD to remove shortcut virus. You might be familiar with CMD. Just plug the USB and follow steps give below.
Open CMD by pressing windows+R or from Start Menu.
Note down the Drive Letter of USB drive from My Computer.
I am assuming drive letter to be “G”.
Migrate to G drive in CMD by entering G and press enter.
Now copy and paste the code given below
**“attrib g:*.* /d /s -h -r -s”**
Replace “g” with drive letter of your pen drive.
Now shortcut virus will be removed from selected flash drive.


METHOD 3:- USING NOTEPAD

This one is another easy method you can try out.
Open Notepad.
Copy and paste code given below.
@echo off attrib -h -s -r -a /s /d Drive Name:*.*
attrib -h -s -r -a /s /d Drive-Name:*.*
@echo complete**
Replace drive name with name of your flash drive.
Save this file as virusremover.bat.
Run virusremover.bat and restart PC.
Shortcut virus are now removed from your PC. 


thanks #sparrow

How to make yor PC welcome you


credits : XposedGp

Open Notepad , copy the code below and paste it.


Dim speaks, speech
speaks=”Welcome to your PC,"Sparrow"
Set speech=CreateObject
(“sapi.spvoice”)
speech.Speak speaks
In place of Sparrow you can
place your name
Save the file as Welcome.vbs
Now move the Code To
C:\Users\USERNAME\AppData\Roaming\Microsoft\Windows\StartMenu\Programs\Startup
Done!!!


Thanks #sparrow

Tuesday 21 July 2015

How to Get Recycle Bin Feature on Android.


1. Download and Install Dumpster on your Android phone or tablet.

2.Once installed, open the app and accept the ‘Terms and Conditions’.

3.In the initial setup page, select all the files types that you want the app
 to save when they are deleted and tap on ‘Next’ button.

Note:
If you have a rooted Android device, you can turn on the “Allow Root Access
option for better working of this app.

Thursday 11 June 2015

How To Use Three WhatsApp Account On An Android Phone (updated v1.25) [25th July 2015]


Credits :
Suckerberg
 sparrow paul

Features:
-AntiBan & Ban Proof
-Full Customization
-Osm Privacy Features . Hide Last Seen, Double Ticks, Blue Ticks, Typing for contacts/groups
-All WhatsApp+ Features (few exceptions)
-Toast when someone goes Online
-New Material Design Base
-Select between Old UI & Calls UI
-Three WhatsApp+ Reborn in One Android Device
-Works on Note 4 , S6 in which WhatsApp is pre installed
-Preview Images & Videos without downloading just like iOS
-Group Stats
-Much much more.

What's New in v 1.25
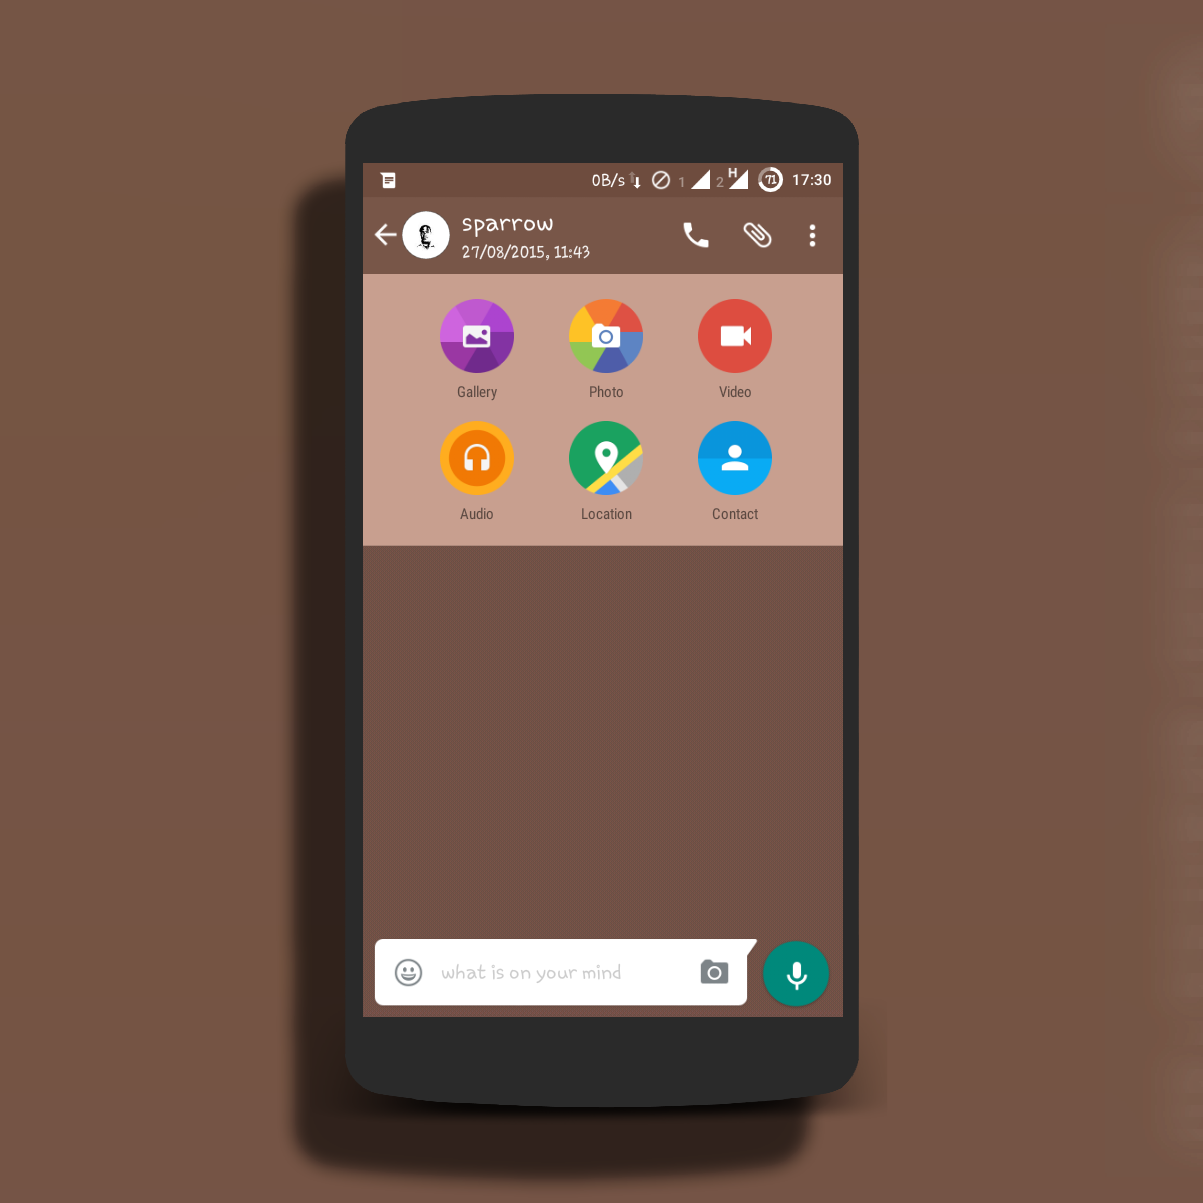
-[Temporarily Removed] Image picker icon due to technical issues
-[Fixed] Chat with pics layout (Mods 1.3.x)
-[Fixed] Bubbles overlapping with each other.
-[Fixed] Crash while opening WhatsApp Web & Sending location
-[Fixed] Crash when 6.0C and 1.2.11C enabled on 4.1 Lower devices
-[Developed] Dividers. They will get hidden and coloured now.
-[Developed] Emoji header , body color, icons color, selected color.
-[Developed] header icons color changing in CALLS UI
-[Developed] Calls UI header mods “Show my name”, “My status” and added FAB auto-close in CALLs UI
-Redesigned All icons to Material Design in high quality upto 2k display devices. Added 2 more icons INDIGO & Teal.
-Redesigned mod 6.4 to set DEFAULT UI
-{Added} confirmation dialog to make calls, No more accidental calls
-{Added} 1.1.19 to hide call icon & 1.1.20 to hide contact pic in Chat screen header
-{Added} “Search Web” and “Attach Music” option in Chat screen menu
-Now new changelog will be shown when you open FAPP Settings. Added preference to view changelog
-Now opening app from widget will open default UI
-Many other changes & Other bug fixes

STEPS:
-Install original whatsapp from play store
-Register number 1 and verify it. 
-Do some chat and backup conversations 2-3 times
-Now go into "APP INFO" for official whatsapp and "CLEAR DATA"
-Install WhatsFapp (com.whatsfapp),enter Number 1 and restore chat backup so number 1 is settled now
-Now open official whatsapp and enter number 2 , verify it and do some chat again
-Backup chats 2-3 times and clear data of official whatsapp
-Now Install WhatsFupp (com.whatsfupp) and enter number 2 there , restore chat so number 2 is settled now
-Open official whatsapp and verify number 3 so number 3 is also settled now
-Enjoy 2 accounts with whatsapp+ reborn and 1 account on official whatsapp share this mod to your friends

DOWNLOAD LINKS

Whatsfapp

How to enable the hidden developer options on android.


Credits
To You The One Reading

Enabling developer option expose your android phone to some more tweaks like 

*Enabling USB debugging
*Show touches
*Change some processes.

STEPS
** Open the app drawer
** Click on settings and go to about phone
** Tap the build number 4 times
** You will see some response you are 4 steps from being a developer then tap till it shows you are now a developer
** Go back to your setting you will find developer option on the about phone click on it and you will see the tweaks.
** To enable developer options just tick it.
After you have enable the developer options it can not be removed until you perform a factory reset.

Thanks

#sparrow

Advantages of Rooting your android device and Why you should


credits:
Adams De Software
Extrema
Zerks

After buying a new android phone the best thing to do if you really want to enjoy your phone is to root it that is grant it superuser permission. But after rooting you have void your warranty, but just leave your warranty alone root your device because of this reasons.

1. Lot of new applications and uninstall useless apps.
When you root your phone you will have lot of more applications that support only rooted devices and will be able to delete bloatwares (Useless apps) from your phones. Most phones comes with bloatwares that means useless apps like xender,jetpack joyride,palmplay, YouTube Etc. Most are found in the /system/vendor/operator/app folder in the system of your phone, While some are found in the system/app folder You can simply use Root explorer to delete them. The apps you can install after rooting include Root explorer,Root firewall,screen recorder apps,titanium backup Etc.
These root apps are also available on the Google play store and most are downloaded for free.

2. Install Custom Recoveries
After rooting your android device you have open the gate of installing/flashing any custom recoveries like Clockworkmod CWM, TWRP,CTR etc. To enable you to backup Nandroid Backups. The custom recoveries can be flashed with various ways for mediatek devices we can use the mobile uncle,flashify method etc.

3. Unlock hidden features
After rooting you will unlock more hidden features like overclocking,theming,tweaking with some apps like Xposed framework, SetCPU etc

4. Improve your battery life
You can also improve your battery life by underclocking with SetCPU or CPU master ,killing/freezing unused apps with taxk cleaner apps like Dx toolbox,Clean master etc to save your data. You can also use Root firewall to kill any applications consuming your background data.
Who likes how the battery consumes heavily.

5. Flashing New Roms
Most reason while android users root their phone is that they will be able to flash new Roms that will make their android device look extremely beautiful jist like the Miui Rom of xiaomi phones it is the most beautiful Ui every android user will like to flash on their phone, The cyanogen Rom is the best Rom do android devices but it is mostly for Qualcomm devices. An so on Roms like lewa,Aosp,Paranoid,PAC Etc
Some custom Roms are upgrade to your stock Rom for example some devices without OTA updates may get updates from their custom Roms developers.

6. Block pop up ads
Most applications manufacturer put advertisement on their apps as this is the way they earn from their free apps .
This allow you to block annoying pop up ads in some apps with applications like AdFree, AdAway and Ad Block Plus. But these apps are already been deleted and blocked in Google play store but can be searched and downloaded online.

7. Tweaking and theming
This is also another great reason why most Android users root their phones,because they will be able to change the look and feel of your phone because most stock ROMs are just too boring. In the tweaking session there are lot of tweaks for android phone like the increasing speaker quality, change imei, adding on screen navigation bar etc but this tweaks I mentioned here is for MTK devices. The best theming and tweaking applications is using the xposed modules. There are lot of modules used for Xposed, Some are for tweaking while some are theming. The xblast, Gravity box, etc ate used for tweaking while Xtheme engine is used for theming to your feel.

8. Get features of other High end devices
After you have rooted your phone you will have some features of high end devices. Example when you flash a Samsung Ui themed rom for your device you will have the great features of the Samsung phones like multitasking etc.

Note:
always root your device at your own risk!!!!

Thanks .
#sparrow

HOW TO MAKE A DRIVE BOOTABLE ON WINDOWS 7


Credit
Emmanuel Akor

1.Open the app ( rmprep USB)
2.Under the volume label name it win7
3. Under the 3 boot option choose winPEv2/WinPEv...  Its the first option there
4 under file system and overrides select
Fat 32
Boot as HDD
Force use of LBA calls
5. Choose where your win 7 setup is under the choose copy folder .
6. Select copy files from here after formating is ticked .
7 . select prepare drive .
8. When the copy is done select eject drive.

Thanks
# sparrow 

Monday 8 June 2015

Hack Password Of A Wifi Network Using Your Android Phone (2015). 100% working.

Credits:
Othniel
Nii
Pharell

How to hack WiFi password on Android? Its my pleasure to introduce this to my esteem viewer, a straight forward step on how to hack a wireless password using your android phone.
its so frustrating when your subscription expire or you don't have data bundle yet, and you need to access your mail, Facebook, WhatApp and you are left with just bunch of wireless networks available already locked by the owner.

This article will show you how to hack WiFi password on android, you don't need a window or Linux or any form of computer to do this, its so easy on android now as long as your android phone is compatible with the software.

Although not all android phone can hack WPS pin, but here is how you will know if your phone can get the job done,
if your phone run has a Broadcom bcm4329 or bcm4330 wireless chip-set
if you add Cyanogen ROM you have a chances of success.

supported device

Htc desire HD
Samsung Galaxy S1/S2/S3.
Nexus 7
Nexus one

steps

step one: download bcmon on google code website.
this will activate the phone to monitor mode

step two: install and run it.

step three: download and install Reaver here
this software enable the cracking of WPS PIN . it retreive WPA2 passphrase. its can also be downloaded from XDA developers website.

step four: lauch the Reaver, this will ask for a confirmation message after which you will choose the network you want to hack. also enable the advance automatic settings.

Step five: Once this is done correctly all you need to do is to tap the attack button at the buttom of the Reaver settings menu. this will show you the progress of the cracking . then you will see the key to the wireless network you just cracked.

Thanks #sparrow

How to transfer files between devices ( Phone & PC )with Super Beam [FTP] [FILE TRANSFER PROTOCOL]


credits:
kingandie(pharell)
Twitch
Ghost

1. download the required files from here

2. install the cracked sbeam apk on your android device.

3. open the superbeam.exe(portabe) on your computer(requires java 1.6.0, which is bundled with the attachments, install it)

4. make a portable hotspot with your phone, and connect your pc to it.

NOTE
(you don't need to have your mobile data on for it to work)
(steps varies depending on your android version)

5. with your sbeam on your pc, click send and select your wireless adapter.

-another window pops up and asks you to drop your files.

6.drag and drop the file which you want to send

7. open super beam on your android phone

8. tap the menu and select the recieve option

9. tap the key option and enter the key the super beam on your computer generated or you can also scan the QR code generated.

10. click ok, select where your files should be  saved and click OK

11. it will begin the transfer.


Next time, just repeat from step 4. you don't need to install the the softwares again.
works with android to android too,
just install on both androids and follow from step 4
Thanks #sparrow

How to transfer files with Es file manager [FTP] [FILE TRANSFER PROTOCOL]


 credits :
 Ghost
 Twitch
 Othinel

1.download Es file explorer from here

2.enable ur wireless hotspot n connect ur pc to it.


3.open es file explorer

4. Press the button on the top left corner of es file explorer and open network and click remote manager. 


5.turn on remote manager.


6.enter the ftp address displayed in your browser and press the enter key. I used chrome in the screenshot below.


7. The files on your sd card will show in the browser. 

8. To get the file you need on your pc, click on it and it will immediately begin to download .

NOTE
You don't need to enable data connection before you can use this feature. 

Thanks #sparrow

Sunday 31 May 2015

Increase internet speed by 20% without any software 100% working

credits
 Programmers Pub
 Tips & Tricks

Microsoft reserves 20% of your available bandwidth for their own purposes like Windows Updates and interrogating your PC etc. By unreserving this bandwidth, you can make your internet connection faster. By 20%. The steps to do so are – 

1. Click Start then Run and type "gpedit.msc" without quotes.

2. Then go to Local Computer Policy>Computer Configuration>Administrative Templetes>Network>QoS Packet Scheduler. Click on QoS Packet Scheduler. In the right side , find Limit Reservable Bandwidth and double click on Limit Reservable Bandwidth.

3. It will say it is not configured but the truth is under the ‘Explain’ tab. Select ‘Enable’ and set reservable bandwidth to zero.

4. Click on ‘Apply’ and your internet speed will boost up by 20%


Thanks   #sparrow

How to boot Itel into recovery mode

credits: 
webdryk
Tips & Tricks
Adams

Booting into recovery mode on an Itel (Spreadtrum Android) phone is different from the technique used on MTK phones like Tecno, Gionee, Innjoo, Infinix etc. To Boot into recovery mode on an Itel phone:

1. Remove the battery then slot back in
2. Press and hold the Power button
3. Press and hold the Volume decrease (Volume -) button
4. Immediately you see the Itel boot animation, release both buttons (Power & Volume decrease )
5. You should see a green Android lying on its back.
6. Press the Volume increase button to proceed to recovery mode
7. You should now be in recovery mode
8. Use volume buttons to navigate and power button to select

Thanks    #sparrow

Top 10 free web hosting sites for 2015.


credits:
Ghost
Nii
Betmele
Webdryk


 We have selected the best web hosters that makes it easy for you by selecting the hosting services.

000WebHosting.com

000Webhosting is better than paid hosting, one of the best top class free web hosting services without advertising. It provides 1.5GB of disk space, 100GB/month of data transfer, control panel, a ftp account and 99% uptime. Users can even monitor the server uptime. This webhosting service even provide free user support.

FreeHostingNoAds.net

FreeHostingNoAds provides 100% ad free service forever. It provides 20GB disk space, 200GB data transfer, Free site builder, hosting our own domain and including few more features. Users can even create free domain name user .t15.org provided by FreeHostingNoAds.net

Hostinger.in

Hostinger is Indian based free hosting service. It provides 2GB of disk space, 100GB traffic, PHP and MySQL, site builder and no ads or banner. It is easy to use and it has auto install using a software like within a few clicks you can install WordPress, Joomla, PrestaShop, phpBB, Drupal, and many other scripts.

5GbFree.com

5GBFree hosting provides 5GB of disk space and 20GB of free bandwidth , along with 1 FTP account and 3 MySQL database. With 1 click we can install WordPress, Joomla, Drupal and many more scripts same as other hosting websites. Support is provided for free accounts through a forum page.

FreeHosting.com

FreeHosting  seems to look like really free as it provides 10GB of disk space, 25GB of data transfer and free subdomain registration for 1 year with cPanel, no forced advertisements or links, 1 email account on the users domain.

ByetHost.com

ByteHost is also one of the best free hosting services as it provides free FTP, PHP 5.3, MySQL and very popular feature with automatic script installer such as PHPbb2 and PHPbb3, XOOPS, PHP Wind, CuteNews, ,Wordpress, Zen-Cart,  MyBB, UseBB, MyLittle Forum, Joomla and many more. Byethost provides only 1GB of disk space and a FTP account and File Manage with free tech support and free community access(Forums). The main feature in this is it provides https SSL on all free hosting domains. (self signed certificate).

x10Hosting.com

x10Hosting has free web hosting which is powered by private cloud, providing immensely stable and blazing fast performance. It provides user with a full web hosting account and the latest versions of PHP, MySQL, and cPanel. It also offer a one-click web software installation and an easy to use website builder!

Wix.com

Wix  is the best places to create a website but the problem is on free hosting we can’t use our own domain. Wix provides more than 100s of HTML5 templates and simple drag n’ drop web builder. It also provides responsive web design for mobile visitors and all time support

Yola.com

Yola brings your website online in less than 30minutes. On free plan it provides 3 pages, 1GB bandwidth, 1GB storage and yola subdomain.

Blogger.com

Blogger is a free service run by the company Google. It provides unlimited bandwidth and disk space. It only supports .xml files. Users can host their own websites or use blogger subdomain. There are more than 1 million of blogger themes. It is user friendly and easy to use


THANKS . #Sparrow

List of top 10 high speed internet DNS server addresses


credits
Nii
Ghost
Betmele


Google:
Preferred DNS server – 8.8.8.8
Alternate DNS server – 8.8.4.4

Comodo DNS:
Preferred DNS server – 8.26.56.26
Alternate DNS server – 8.20.247.20

Norton DNS:
Preferred DNS server – 198.153.192.1
Alternate DNS server – 198.153.194.1

OpenDNS:
Preferred DNS server – 208.67.222.222
Alternate DNS server – 208.67.220.220

Level3:
Preferred DNS server – 209.244.0.3
Alternate DNS server – 209.244.0.4

ScrubIT3:
Preferred DNS server – 67.138.54.120
Alternate DNS server – 207.225.209.77

OpenNIC4:
Preferred DNS server – 69.164.208.50
Alternate DNS server – 216.87.84.211

Public-Root5:
Preferred DNS server – 199.5.157.131
Alternate DNS server – 208.71.35.137

DNS Advantage:
Preferred DNS server – 156.154.70.1
Alternate DNS server – 156.154.71.1

SmartViper:
Preferred DNS server – 208.76.50.50
Alternate DNS server – 208.76.51.51

Happy Browsing # sparrow

Tuesday 12 May 2015

How To Make IDM Free For LIfe

credit : onhax.net
            programmers pub
            sparrow paul
-----------------------------------------------------

How to Crack ?

1. Install IDM latest version using IDM Setup file/ Or update IDM Using IDM Quick Update
2. Run IDM Universal Web Crack
3. Update IDM Universal Web Crack if needed
4. Select IDM Installation path
5. Click Crack :)

When a New version of IDM comes ?

1. Update IDM
2. Open Crack
3. It will ask to update crack.Update it
4. Crack as usual

Info [Also check Read Me compiled with the Crack]
-----------------------------------------------------
• update.bin file will be created after crack update process.do not delete it if you want to keep the crack uptodate.

• perfect cracking will be done once, you get all three ticks in green or purple in the crack status (purple tick means update.bin found and loaded)

• You can use quick update function of IDM to update IDM. But if you get fake serial message after applying the crack, uninstall IDM and install the latest version of IDM using setup and re-apply the crack.

• if a new crack version release becomes late, you will get a notice when opening the crack :)

Click to download


===============================

Have A Happy Cracking.